Introduction:
Leather crafting is an art that has been practiced for centuries, and dyeing leather is one of the fundamental techniques in this craft. Whether you’re a seasoned leatherworker or just starting out, mastering leather dyeing can elevate your projects to new heights. In this comprehensive guide, we’ll explore the various techniques, tips, and tricks to help you achieve professional-quality results in your leather dyeing endeavors.
Understanding Leather:
Before diving into dyeing techniques, it’s essential to understand the nature of leather. Leather is a natural material derived from animal hide, and its porous structure makes it ideal for absorbing dyes. However, not all leather is created equal, and different types of leather may react differently to dyes. It’s crucial to choose the right type of leather and prepare it properly before applying any dye.
Types of Leather Dye:
There are two main types of dyes used in leather crafting: oil-based and alcohol-based dyes. Oil-based dyes penetrate deeper into the leather, resulting in richer and more vibrant colors. Alcohol-based dyes, on the other hand, dry faster and are ideal for achieving subtle or translucent effects. Depending on your preference and the desired outcome, you can choose the type of dye that best suits your project.
Prepping the Leather:
Proper preparation of the leather is key to achieving excellent results in dyeing. Start by cleaning the leather surface thoroughly to remove any dirt, grease, or previous finishes. You can use a leather cleaner or a solution of mild soap and water for this purpose. Once the leather is clean and dry, smooth out any wrinkles or imperfections using a leather slicker or bone folder.
Applying the Dye:
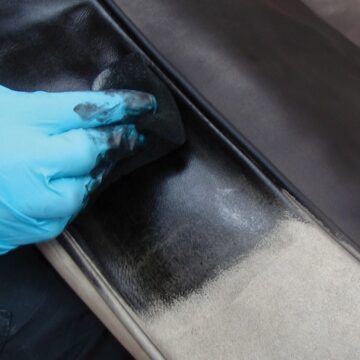
Now it’s time to apply the dye to the leather. Whether you’re using an oil-based or alcohol-based dye, the application process is similar. Begin by applying a thin, even coat of dye using a sponge, brush, or airbrush. Work in small sections and make sure to spread the dye evenly to avoid streaks or blotches. If you’re looking to achieve a multi-colored or gradient effect, you can layer different shades of dye or use techniques like sponge painting or stippling.
Sealing the Dye:
Once the dye has dried completely, it’s important to seal it to prevent it from rubbing off or fading over time. There are several options for sealing leather dye, including leather sealers, finishes, and waxes. Choose a leather product that is compatible with the type of dye you used and follow the manufacturer’s instructions for application. Be sure to apply the sealer evenly and allow it to dry thoroughly before handling the leather.
Finishing Touches:
After sealing the dye, you can further enhance the appearance of your leather by adding additional finishes or embellishments. Consider using techniques like antiquing, burnishing, or stamping to add texture and dimension to your project. You can also experiment with different types of leather finishes, such as matte, glossy, or satin, to achieve the desired look.
Conclusion:
Dyeing leather is a rewarding and creative process that allows you to personalize your leather projects and bring them to life. By mastering the techniques and following the tips outlined in this guide, you can achieve professional-quality results and take your leather crafting skills to the next level. So gather your materials, unleash your creativity, and start dyeing!


